VW Iltis
Ref: ACE #35101 0,5ton truck
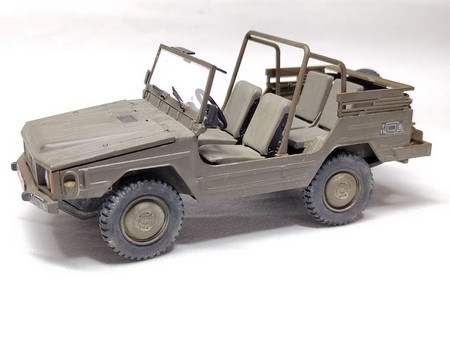
VW Iltis
Ref: ACE #35101 0,5ton truck
The Iltis is a light truck designed by Volkswagen Audi to replace the Munga within the Bundeswehr. Its design started from the failure of the Europa Jeep in 1976. Volkswagen was chosen to build the new vehicle from 1976 and decided that Audi would develop the project.
The 10 pre-series vehicles were delivered from November 1976 to February 1977. In December 1977 the Bundeswehr certified the Iltis and an order for 8800 Iltis was placed.
The Iltis has a 0.5 ton payload and could carry 4 soldiers. It also could tow a 0.5 ton trailer.
Within the Bundeswehr 3 types of vehicles were designed: the basic multirole vehicle, the ambulance and the vehicle powered by a turbo-diesel engine. There were several configurations for the basic vehicle: Milan antitank missile portee, field telephone vehicle, RASURA radar vehicle, artillery survey team vehicle and command and communication vehicle.
From 1989 the Iltis has been replaced in the Bundeswehr by the Mercedes G-Wagon.
The other users of the Iltis were France within the French Forces in Berlin and Estonia. Belgium and Canada used the version built under license by Bombardier.
The kit
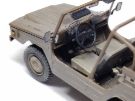
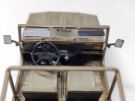
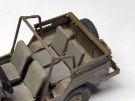
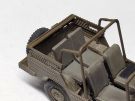
Released in 2024, it is the very first 1/35 scale model made by ACE. It depicts the basic vehicle and allows to build either the VW or the Bombardier Iltis. The design of the model enables to build a vehicle with the tarpaulin and the doors or with the tarpaulin frame folded down.
It comprises 6 pretty soft grey plastic sprues, 1 clear sprue, 2 small rather thick PE plates, 5 vinyl tires nicely molded and 1 8-page notice. The plastic poorly reacts with the Tamiya extra thin cement. It is advised to use a thicker glue.
The cast is good with pretty thin mold lines and no flash. The level of detail varies from good to simplistic. Many parts are too thick with regard to the scale. The fit is correct however there is very few location marks and the latter often need to be reworked. Many parts are glued on their edges.
The notice is the real problem of the model. It features many numbering mistakes and imprecision to glue parts. The rare options between the VW and the Bombardier vehicles are rightly mentioned. On the contrary ACE do not warn you that if you assemble the tarpaulin frame it is no longer possible to use the tarpaulin and the doors.
At the end of the notice there are the decoration instructions. ACE give three options: a Bundeswehr 3-tone camo, a Bundeswehr Gelboliv camo and a Belgian army plain green camo. For the 3-tone camo the camo scheme is incomplete as it misses the top and the right side views. ACE give the RAL number only for the Gelboliv.
The build
It begins with the assembly of numerous sub-assemblies. The steps are given letters from A to Z then the last steps have neither letter nor number.
The following comments will only deal with steps with some issues.
At step B/B1 the numbers of the front seats frames are wrong. For B the right parts are B8 and B11, for B1 they are B9 and B10.
At step C, the cap on the tank is numbered A17a however on the sprue there are parts numbered A17. The biggest one is the right one.
At steps F and G the parts do not have any positioning marks. The orientation of A64 and A65 lacks precision.
At ste pH you need to enlarge the holes in which A35 and A36 are inserted.
At step M, A13 should be A11.
At step N part B23 is mentioned but not drawn. It is the exhaust line which is glued at step S only.
At step R/R1 it is better to glue the leaf springs on D22/D20 before gluing D23/D19. It is also better to glue the rubber stops A87 and A90 beforehand.
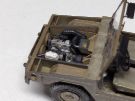
At step S you need to assemble the engine and the gear box together before installing them onto the chassis F3. The front transmission shafts are mentioned but not drawn. The rear transfer case is sub-assembly F and not G. On the suspension triangles C21 to C24 you have to enlarge the notch at the end to glue the transmission shafts.
The leaf springs supports A51 to A57 (and not A57) are angled. It is not advised to glue the shock absorbers before having installed the leaf springs.
At step T ACE omitted to mention part A19 between the cap A10 and the jerrycan.
At step Y the side frames of the parking brake are inverted.
The following steps do not have letters.
For the assembly of the rear hull, nearly all the parts are inverted: D18 and D17 and F2 and F9. The large transversal part E5 is omitted but it is drawn.
For the front fenders there are again numbering mistakes. On the left you have to use E10 and C26, on the right E9 and C17.
The embossed locations of the seats brackets A69, A70, A74 and A75 are too far from each other. It is advised to glue the brackets on the seats first and to glue the seats when needed.
Once the hull is assembled ACE ask yo uto glue it onto the chassis. Beforehand it is better to the hoses A79 and A80 between the engine and the cooler otherwise it will be very hard later on. Likewise it is better to glue the air filter W at this moment.
At step Z position of B18 is unclear. You have to thoroughly read the drawings to find out how to orientate it.
The fuel filler tube is A18 and not A13. The wipers motor A40 must be glued to the windscreen G1 where its location is molded as a recess.
The assembly ends with the installation of the windscreen and the tarpaulin. For the latter there 2 options that ACE do not mention: tarpaulin in place or frame folded in the stowed position. For the folded option the right parts numbers are D3 instead of A3 and B1 instead of F1. At this step you can drill out the numerous holes in the exhasut protection D15.
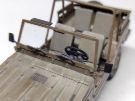
On the windscreen you have to glue the rearview mirror. To avoid the fog effect due to the CA glue, I first glued a piece of styrene rod to the back of the mirror P11. I did the same for the PE wipers.
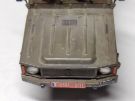
To conclude the build you have to add the front turning lights omitted by ACE. To do so I cut pieces of 0.25 mm wide Evergreen strip which I sanded so they are as thin as possible. The actual ones are embossed in the car body.
The decoration
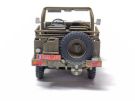
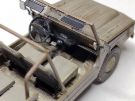
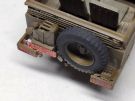
As my intent was to represent a French Iltis in service with the French Forces in Berlin, I sprayed some AK Real Color Gelboliv. The raised details have been paint brushed with the base shade enlightened. The various details are painted in different shades of grey and black. The seats are painted XF-51 Khaki drab. On some pictures the seats colors are not always the same. The tires are painted XF-85 Rubber black. As the paint does not adhere well to the vinyl a coat of mat varnish is used as a primer.
The markings come from a special edition issued by Azimut. The registration plates are rectangular whereas the angles should be round. The real issue is that the decals are printed on a transparent film and are not opaque enough. Moreover the white is not printed. So you have to paint white all the markings locations before applying the decals.
For the weathering I just applied several filters of XF-57 Buff to give a slightly dusty look as the vehicles were mainly driving in the city.
Conclusion
Despite a complicated build due to the numerous mistakes of the instructions the result is satisfactory. However ACE should improve the design of the positioning system of the parts as well as the way they are glued. This is by no means a model recommended for beginners.
References
http://www.primeportal.net/trucks/hans-hermann_buhling/vw_iltis/
Iltis Tankograd Militärfahrzeug Spezial 5057 Carl Schulze Tankograd Publishing
Click on a thumbnail to see the full sized picture
|
|
|
|
|
|
|
|
|
|

|
|
|

|
|
Last updated: 12/2025