Ref: Vespid #VS350001S German Utility Vehicle 2011 production Eagle IV
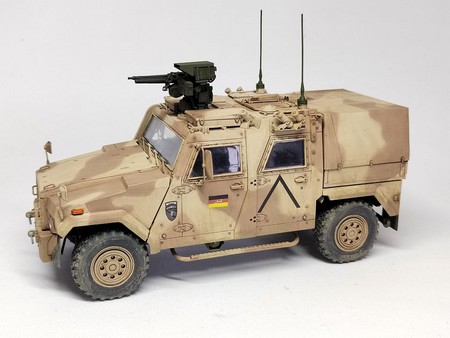
The Eagle IV is an armored utility vehicle designed by the Swiss brand Mowag in 2003 on the Duro IIIP truck chassis. In 2008 the Bundeswehr released a requirement to provide in emergency its contingent in Afghanistan with vehicles protected against IEDs. 25 vehicles were initially ordered and issued. The total amount of vehicles delivred is 453 Eagle GFF2 (patrol, utility and command versions) and 42 Eagle BAT (ambulance version).
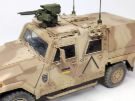
The Eagle IV has a crew of 4 including the gunner of the FLW 100 RWS armed with the 7.62 mm MG3 MG. It features a STANAG level 2 protection, mine protected seats and a fire suppression system. For close protection it also has 6 smoke-grenades dischargers.
It has a payload of 2,1 tons.
The Eagle IV has been deployed to Afghanistan until 2014. It has been in service with the Bundeswehr and the Danish army. It is currently out of production being replaced by the Eagle V.
The kit
Released in 2023 it is the very first 1/35 model of the company. Vespid simultaneously released the standard version with plastic wheels and the version 0001S with resin printed wheels. The box is identical so you must take care of which version is inside.
The box includes 9 light grey plastic sprues 5 big plastic parts of which the chassis, 1 sprue of clear parts, 4 resin sagged wheels, 1 photoetched parts plate, 1 pre-cut masks sheet, 1 stickers sheet for the mirrors, 1 decals sheet and 1 instructions booklet. Some parts are mentioned as not used and some decals are not used too which makes think Vespid could release another version.
The cast is very neat with thin mold lines. The fit is very good even though you have sometimes to clean the contact surfaces. The clear parts fit well. However you have to enlarge the positioning holes for the two lights at the rear. The PE plate is pretty comprehensive even too much. Some parts are very tricky to shape even with a dedicated tool.
The masks for the clear parts are perfect dimension wise.
The 20 page notice split the assembly into 17 steps. Very little options are possible. The drawing reminds Bronco notices. The instructions sometimes lack clearness so it is advised to look at the drawings of the following steps to avoid mistakes. 4 decoration options are proposed: 3 different camo schemes for the German contingent in Afghanistan et 1 vehicle in the NATO 3 tone camo. The paint references are given in 4 ranges including Tamiya. Unfortunately for the latter the paint references are not right. It is also to note that Vespid do not give any paint reference for the interior of the vehicle.
The build
It begins with the assembly of the transmission and the suspension. On the parts of the front and rear axles there are quite thick mold lines to remove. The assembly of the various sub-assemblies is a no brainer.
At step 2 there are many tiny parts to install. The transmission shafts for the wheels are glued by a tiny lug. It is possible not to glue them at this step and wait until step 5 to do so and avoid any break.
Step 3 is easy. I preferred not to glue the supports D11 on the steering rods.
At step 4 I did not glue the front mud flaps as period pictures show them absent most of the time.
At step 5 it is not
necessary t oassemble the wheels if you have the resin wheels. However you have
to glue the wheel covers D3 on the resin wheels. The wheels are not glued yet to
facilitate the painting. If the wheels transmission shafts have noy been glued
at step 2 it is time to do it.
The first elements for the cabin interior are glued.
Step 6 deals with the dashboard and the radio rack.
At step 7 you install
the previous sub-assemblies. Beforehand you need to paint them. As Vespid do not
give any indication it is necessary to find reference pictures (see the
references section at the end of the article).
Bending the PE parts of the support for the gunner monitor is quite a nightmare.
At step 8 you need to install the seats after you have painted them. The cabin is prepared by drilling a series of holes and removing some details. At the ceiling part C33 is too large to be inserted in its location. You just need to thin the base so it can fit.
At step 9 I did not glue the clear parts except for the windscreen. It is masked with the mask provided by Vespid. The fit of the cabin onto the chassis is perfect. The rearview mirrors are assembled and set aside. I only glue them after the vehicle is painted.
Step 10 includes more
tiny PE parts to shape in particular some lights brackets. The roof hatch is not
designed as mobile.
The antennas are set aside pending the painting step.
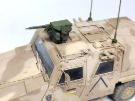
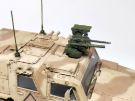
Step 11 deals the RWS assembly with its 43 parts. Again you have to shape tiny PE parts. There are two part number mistakes: read C13 instead of C12 and C57 instead of B57. The RWS is not glued to facilitate the painting.
Steps 12 and 13 come with no issue. I did not glue the rearview mirrors nor the clear parts.
At step 14 behind the cabin you need of glue a kind of bin C55. This one must not rest on the cargo bed but be aligned with the top of the cabin. The very last tiny PE parts must be bent.
At step 15 you have to shorten the rear end of the raised strip allowing the positioning of the side walls C48 and C49.
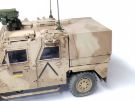
At step 16 you just have to put the tarp over the cargo compartment. The fit is perfect.
The decoration
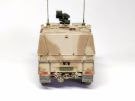
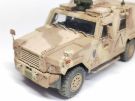
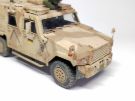
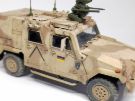
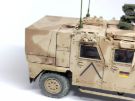
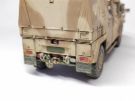
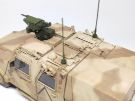
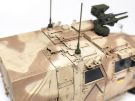
I chose one decoration of the German contingent in Afghanistan. It is the tan and brown scheme. The Tamiya paint references given by Vespid are not right particularly for the tan. I used the RAL paints from the Vallejo set: Vallejo Sandbeige RAL 1039 and Sandbraun RAL 8031. The RWS is painted XF-67 NATO green.
When the camo is applied the rare markings are applied. They are quite thin. To help apply the inverted V I cut it a the tip and then I aligned the both halves.
Then I glued with PVA glue the clear parts after their inner face was painted either chrome or clear orange or clear red.
When all was set I
applied a brown wash over the whole vehicle followed by a pinwash to enhance the
details. Streaking has been made with diluted brown.
The rearview mirrors were weathered the same way before being glued.
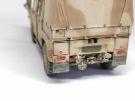
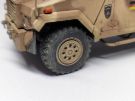
The slightly dirty look of the lower parts of the vehicle has been got by
brushing some very diluted earth paint.
Conclusion
Vespid have released a very nice model for their first time in 1/35 scale. It is a shame that there is no paint indication for the interior. As far as I am concerned I find there are too many PE parts really tricky to shape.
References
Prime Portal walkaround Dieter Krause
Prime Portal walkaround Hans-Hermann Bühling (version ambulance but interesting for painting many details)
Click on a thumbnail to see the full sized picture
|
|
|
|
|
|
|
|
|
|
|
|
|
|
|
|
|
|||
Last updated: 09/2026