Ref: I Love Kit #63537 M1278A1 Heavy Guns Carrier modification with the M153 CROWS

Ref: I Love Kit #63537 M1278A1 Heavy Guns Carrier modification with the M153 CROWS
The JLTV (Joint Light Tactical Vehicle) is a multirole vehicle designed to replace the HMMWV. Its development started in 2011. It had to combine the maneuverability of the Humvee and the robustness of the MRAP. OshKosh project was selected in 2015 and the first orders were placed by the US Army in 2015 followed by those of the Marine Corps. The USAF and the US Navy also ordered JLTV in lesser quantities. In 2022 around 19000 vehicles had been orderes by the Army and the Marines. However in 2025 the Secretary of Defense demanded to reduce the amount of equipment either obsolete or redundant. The Army stated it stopped purchasing HMMWV and JLTV.
JLTV is the name of
family of vehicles including the M1278 Heavy Gun Carrier fitted with a manual or
remote weapon station, the M1279 Utility with a 2.3 ton payload, the M1280
General Purpose with a 1.3 ton payload and the M1281 Close Combat Weapons
Carrier fitted with TOW antitank missiles.
The Marines designed another variant for air defense (MADIS for Marines Air
Defense Integrated System
The JLTV can tow a specially designed trailer.
The JLTV does not have a standard armament. This one is determined by the type of vehicle. It can be a light or heavy MG, an antitank missile launcher or an automatic grenade launcher. The armament is mounted on the roof either in a manual or a remote controlled weapon station.
Depending on the versions the crew of the JLTV is of 2 (version Utility) to 5. It is accommodated in an armored cabin resembling the M-ATV one and providing the same level of protection as in a MRAP.
The JLTV has not seen combat yet. In addition to the USA, it is in service with 8 countries and could be purchased by 9 additional ones.
The kit
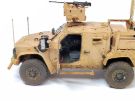
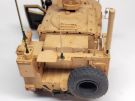
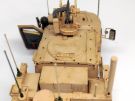
Released by I Love Kit in 2022 it represents the M1278A1 fitted with the M153 CROWS. It includes 7beige sprues, 1 clear sprue, 1 cab floor, 1 cab shell, 5 vinyl tires, 1 photoetched parts plate, 1 decals sheet, 1 sheet of masks, 1 instructions booklet and 1 color plate for the decoration.
The cast is correct and the level of detail average. Many small parts lack finesse. There are some ejection pin marks to deal with and some thick mold lines. The fit is correct, nothing more. You have to enlarge some positioning holes to glue some parts.
The notice is clear overall and without mistakes. Unfortunately it gives no color indications for the interior.
The PE is very thin and fit well to the plastic. However some assemblies are tricky as there are no marks to glue the parts.
A single plain tan decoration is proposed on a separate sheet. No unit indications are provided.
The build
It begins with the interior of the cabin and the large dashboard onto which you have to glue many details which are not very fine. ILK tell you to apply decals and glue the dashboard inside the cabin. However you have to paint it first and then apply the decals.
Steps 2 to 4 deal with the central console, the radio rack and the weapon controls. The extinguisher C18 is coarse. The assembly of the both elements of the radio rack is laborious as there is no marks to position the parts. Moreover there is only one surface to glue the cube in shape. The building of the legs of the weapon controls platform has the same issue as there is no positioning marks.
At step 5 all the previously assembled elements are glued onto the floor. Installing the wheel column is tedious as the positioning hole is too large.
Steps 6 to 8 deal with the 4 seats. The fit of the back rest onto the sear is poorly designed and required to hold the parts while the glue cures to have the right angle. At step 8 you have to enlarge positioning holes in the back rest for the RWS monitor.
Before shifting to step 9 you have to paint all the elements previously assembled. The cabin is glued onto the floor being careful not to break the pedals.
At step 10 the windshields are installed. Beforehand you have to mask the windows and paint the interior black. Weirdly the masks are only mentioned at step 16 which is way too late. The rear wall is not an issue. On the other hand the PE steering column protection PE-12 is hard to bend and install.
At step 11 the wipers are not glued. They will be glued after the painting. However you have to enlarge the positioning holes in part D27 so they can be inserted. Under the cabin you need to glue the drive shafts before protections G7 and G15.
At steps 12 to 15 you have to build the doors. Beforehand the windows have to be masked and the frames painted tan. To find the masks numbers you have to look at steps 13 and 21. Protection pads G1, G2, D19 and D28 are painted XF-85 Rubber black, the locking handles are painted red. If the doors are open the inner faces of G11, G18, D12 and D23 must be painted tan.
Step 16 does not need any comment.
Steps 17 to 20 each deal with a suspension element. You must not follow the sequence planned by ILK. The lower suspension triangle must be glued in the very end when all the parts are ready. You need to thin the base of parts E43 which facilitates the installation of the suspension triangles. You also need to thin the shock absorbers heads. Rods E42 can be inserted directly into the girders which reduces the risk of breakage. The end on the wheel side must be thinned ton be inserted into E24.
Before gluing the suspension elements at step 21, you have to paint them black like all the parts which are glue during this step because they won't be accessible later. Installing the suspension elements is no problem.
At step 22, you have to add the last elements under the vehicle which is no problem.
At step 23 the spare wheel holder is assembled and painted but the tire is not fitted yet.
At step 24 you have to assemble the engine grille. As ILK do not provide the engine, the part is solid and lacks depth. The antennas are not glued to avoid breakage.
Step 25 deals with the cargo bed. Part G8 is slightly to large, a bit of sanding is required so it can fit. The spare wheel holder is not glued pending the vehicle is painted.
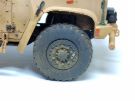
At step 26 the wheels are assembled and painted black. They are glued yet to avoid being masked during the vehicle painting.
At step 27 the engine grille and the cargo bed are installed. The wheels should be glued but they will be after the weathering of the wheels arches.
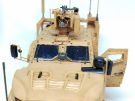
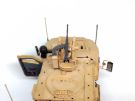
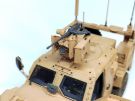
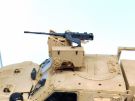
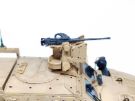
Steps 28 to 30 deal with the remote weapon station. At step 29 you need to shape 3 PE protections without any template which is a bit tricky. There is no positioning marks for them. The MG is poorly detailed. To facilitate the assembling the parts need to be carefully cleaned. It is the same for the cradle parts. The installation of the both vertical plates L5 and L6 is not easy because the positioning rods are coarse. In order to properly position the feeding chute I let the MG mobile in elevation.
Steps 31 and 32 deal with the frame at the back of the vehicle. You need to delete the ejection pin marks which are visible on the inner faces of the vertical poles.
Step 33 deals with the side footsteps which is certainly the hardest part of the build. ILK ask to assemble the footsteps and the slanted tubes and then to glue the small PE chains. The issue if you follow the instructions is that the angle of the footsteps with the hull can be wrong. It is better to first glue the fasteners E34 to the hull to get an idea of the right angle. Then the installation of the chains can be done but it requires patience.
Step 34 deals with the hood. The headlights must be glued inside. It is better to paint the headlights and the hood before gluing the headlights. The latches E5 are not glued as long as the hood is not installed.
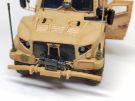
At step 35 the assembly of the bumper and the winch requires some care. In particular the OshKosh logo of the PE protection must be positioned in the right direction.
Step 36 is the last where you glue different details and sub-assemblies like antennas and rear view mirrors. For the latter you need to sand the edges of the mirrors. Concerning the antennas ILK propose different options without any precision about the real possible combinations. You have to refer to actual pictures to avoid mistakes.
The decoration
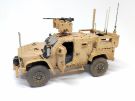
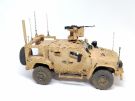
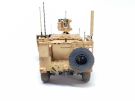
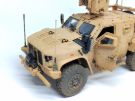
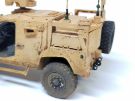
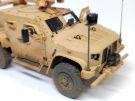
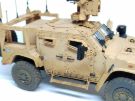
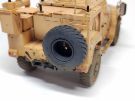
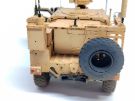
The only option given by ILK is a tan vehicle without any unit indications. The base shade is XF-93 DAK yellow 1942. Many details are painted black among them the numerous bolt heads. For the latter I used a alcohol based permanent marker with a thin tip. After applying a coat of Klir the decals are applied. For many of them you need to cut the fim the closest to the decal as possible. Then a second coat of Klir is applied to secure the decals.
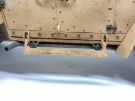
For the weathering I applied a dark brown pin wash to enhance the details. The underside of the vehicle has been soiled by mud made of pigment and dust using different shades of earth.
Conclusion
I Love Kit released a
quite easy to build model. However it is not really accurate especially
concerning the interior. The main flaw is the lack of engine or gearbox which is
seen even with the wheels installed. The lack of instructions to paint the
inside forces you to search over the internet as even the other brands
instructions do not include such indications.
For a minimal price difference, it is probably better to get the RFM model.
Click on a thumbnail to see the full sized picture
|
|

|
|
|
|
|
|
|
|
|

|
|
|
|
|
|
|
|
|
|
|

|
|
|
Last updated: 10/2025