Ref: Tamiya #35383 Type 16 MCV C5 w/winch
Tamiya #12686 Japanese Ground Self Defense Force Type 16 MCV Metal Gun Barrel
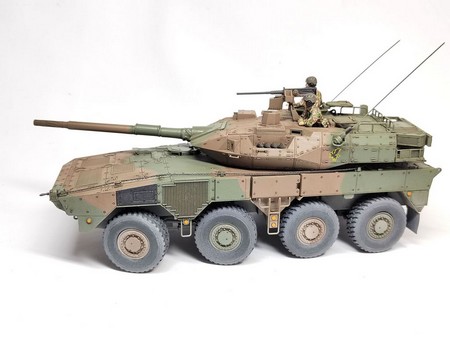
The Type 16 MCV
(Maneuver combat vehicle) is Japanese fighting vehicle designed to be quickly
deployed everywhere in the archipelago where the tanks have been withdrawn. Its
development started in 2007 and the prototypes were released in 2010 and 2011.
The initial order for 36 vehicles was placed in 2016 hence the denomination Type
16.
In 2023, approximately 250 MCV were in service with the Rapid deployment
regiments of the Armored divisions.
In 2020 the C5 version entered service. Among the improvements, there is an air-conditioner installed in the turret bustle. To compensate the lack of stowage room for the crew some rails have been fitted on top of the turret. Some vehicles have been fitted with a winch capable of towing another Type 16.
The Type 16 is armed with a 105 mm rifled gun derived from the British L7 which was already fitted to the Type 74 tank. Its pepper pot muzzle brake helps limit the recoil. The gun is associated to a fire control system designed from the experience of the Type 10 tank FCS. The secondary armament includes a Type 74 7.62 mm coaxial MG and a .50 cal M2 HMG on the turret roof.
Its 570 HP engine along with its independent suspensions allows a maximum speed of 100 kph and an excellent cross-country mobility. Moreover it has run flat tires.
Its crew is of 4 with the driver at the right front of the hull and the commander, the gunner and the loader in the turret.
An Armored personnel carrier, a reconnaissance and a mortar carrier variants have been developed by Mitsubishi however they have not been adopted by the Japanese Ground Self-Defense Force yet.
The kit
Released in 2023, it includes some sprues from the original version released in 2018. It is composed of 6 dark green sprues,1 clear parts sprue, 8 vinyl tires, 1 plate of photoetched parts, 2 sets of polycaps, 1 length of braided nylon, 1 sheet of non pre-cut masks, 1 sheet of decals, 1 notice and 1 historical background leaflet.
The cast is very clean and the fit is perfect. The level of detail is good however as usual it is possible to improve the various handles which are molded solid. The clear parts are perfectly clear. The masks printed on a yellow masking tape must be cut which is not an issue except for the round masks. 3 figures are provided: the commander, the loader and a dismounted soldier.
The 20-page notice is clear and includes 45 steps. Some only concern the version with the winch. The decoration instructions are in the historical leaflet and allows to represent either a vehicle with the winch from a school unit or one without the winch from a regiment. The paint references for the main camouflage are from the TS and LP ranges and not the XF one. Here is the equivalence: Olive drab TS-70 = XF-74, Brown TS-90 = XF-72 and Dark green TS-91 = XF-73.
The build
It begins with the assembly of the hull which comes in 6 parts. As soon as step 1 you must choose to install the winch or not as there is a series of holes to drill for the version with the winch I opted for.
At step 2 the upper hull is glued to the floor. Tamiya require to paint the latter XF-74. However it is better to paint it later.
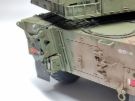
Steps 3 and 4 deal with the front and rear panels. You have to glue the clear parts and paint the inner faces as per the instructions. The masks are cut then applied to the outer faces. The mud flaps are thinned at step 4.
Steps 5 and 6 deal with the gluing of the sides and front and rear panels to the hull. The fit is perfect.
Step 7 deals with the assembly of the steering which is workable.
Steps 8 to 12 deal with the suspension and the transmission and come with no issue. Each assembly is independent but unlike the steering the suspension is not workable.
Steps 13 and 14 deal with the uprights and the brake disks. They are 4 different types which the notice clearly states.
At step 15 the final transmission shafts between the steering and the uprights are installed and the steering is complete.
The tires are not installed at step 16. They will be after the painting.
Step 17 deals with the addition of several details to the vehicle front and the driver compartment.
Steps 18 to 24 only concern the winch version. If it is not used the next steps are 25 and 26.
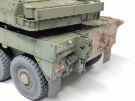
The assembly of the winch begins at step 21 with the various pulleys at the rear of the vehicle and on the roof. They all are glued at step 22. If the cable is not used, you have to install a cover on the cable outlet at the rear of the vehicle.
At step 23 you install the cable. You start by gluing the tow eye to the front end of the braided thread which is issued. Then the latter runs along the pulleys and is inserted inside the hull where it is inserted in a kind of turning key to which it is glued. The key is installed on a polycap on the floor. By having it pivoting the cable can be tensioned.
At this stage the hull is complete and the build concerns the turret.
Like the hull the turret is composed of several parts: the roof, the floor, the side and rear panels.
At step 27 the fit of the roof onto the floor is not perfect. It looks like the front roof is slightly warped.
At step 29 the side panels are glued. They feature the smoke-grenades dischargers. It is better to glue them from the front to the rear.
The assembly of the turret at step 30 is perfect.
Step 31 and 32 do not require any comment.
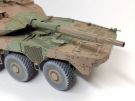
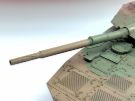
At step 33 you assemble the gun barrel. Having chosen to use the Tamiya aluminum gun, I still had to add the plastic bore evacuator and the dust cover. At least I did not need to represent the holes in the muzzle brake. On the plastic gun, you have either to apply a decal or drill the holes whilst using the template mask given by Tamiya.
At step 34 the hatches handles which are solid ae replaced by styrene rod. The inner faces of the hatches are not detailed. So I first added a piece of masking tape to hide the ejection pin marks. Then I made handles from styrene strips.
At step 36 you need to be careful with the orientation of the rails for the crew equipment on top of the turret.
Steps 37 to 40 deal with the bustle rack and air conditioner assembly. Tamiya provide 3 steel PE grilles which are a bit delicate to shape. However if you follow the instructions the build is quite easy.
At step 41 you have to assemble the .50 cal MG. The front sight location is hollowed before the MG body halves are assembled. The muzzle is drilled out.
This concludes the
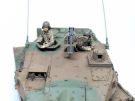
assembly. The ultimate step deals with the figures: 2 torso crew members and 1
dismounted soldier. The crew members have the radio set molded with the head.
The helmet is a separate part. The clear goggles have not been used as they are
too thick.
The dismounted soldier which I haven't built comes in two parts: front and rear
faces. It is armed with an assault rifle.
The decoration
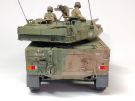
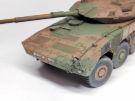
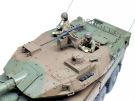
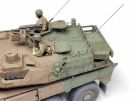
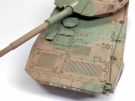
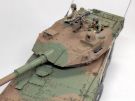
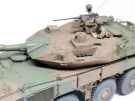
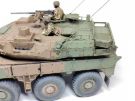
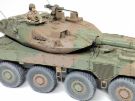
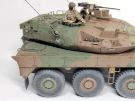
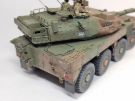
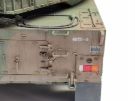
The camouflage scheme is the same for the both options given by Tamiya. Having chosen the one with the winch, I represented a vehicle from the 4th armor school regiment in camp Komakado. The paints used are XF-74 JGSDF Olive drab for the underside the hull, and XF-73 JGSDF Dark green and XF-72 JGSDF Brown for the camouflage.
For the weathering, after having sprayed a coat of gloss varnish, I applied a dark brown wash all over the vehicle. Then I applied a darker brown pinwash to enhance the details. The underside of the vehicle and the wheels are been dusted with various shades of Lifecolor liquid pigments.
Conclusion
Tamiya still remains the reference for the modern Japanese equipment. The design is well thought which makes the assembly easy thanks to a perfect fit. The workable steering is a plus to give life to the model. The masks and the PE plate included in the box are appreciated even though one can regret that Tamiya still do not use brass for the PE. The aluminum gun is not mandatory however it really helps represent the muzzle brake holes.
Reference
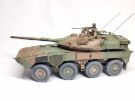
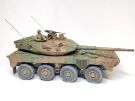
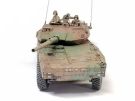
Click on a thumbnail to see the full sized picture
|
|
|
|
|
|
|
|
|
|
|

|
|
|
|
|
|

|
|
|
|
|
|||